
EayTools Image Converter is a powerful, user-friendly desktop application built for converting image files across a wide range of formats. Whether you need to batch-process photos, resize images, or adapt files for web, print, or mobile use, this tool delivers a complete solution with professional-grade output quality.
Key Features
- Batch Conversion: Convert multiple images or entire folders in a single operation
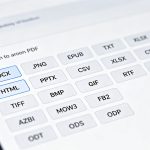
- 10 Output Formats: JPG, PNG, BMP, GIF, TIFF, WebP*, ICO, DIB, EMF*, WMF*
- 15+ Input Formats: JPG, JPEG, JFIF, PNG, BMP, GIF, TIFF, TIF, WebP, EMF, WMF, ICO, DIB, HEIF, HEIC Note: WebP output is currently saved as PNG format. EMF and WMF output formats are under active development.
- Customizable Quality: Adjust image quality from 1% to 100%
- Resolution Control: Set output resolution anywhere from 72 DPI to 600 DPI
- Multi-language Support: English, Chinese, German, French, Spanish, Russian
- Auto Language Detection: Automatically matches your system language on startup
- Smart File Management: Automatically resolves file naming conflicts
- Real-time Progress: Track conversion status with detailed, up-to-date progress indicators
- High-Quality Processing: Uses premium bicubic interpolation for sharp, clean image resizing
Benefits
- Saves Time: Batch processing eliminates repetitive, manual file-by-file conversions
- Professional Results: High-fidelity image processing ensures optimal output quality
- Easy to Use: Intuitive interface works for both beginners and advanced users
- Flexible: Broad input/output format support covers nearly every common use case
- Reliable: Robust error handling and comprehensive logging for stable performance
Basic Conversion Workflow
Step 1: Add Files
Choose one of two methods:
- Add individual files: Click Add Files, select one or more images in the file dialog, then click Open to add them to the queue.
- Add an entire folder: Click Add Folder, select a folder containing images, and click OK. A progress dialog will appear as files are scanned and added; you’ll see a confirmation message when finished.
Step 2: Select Output Format
Click the format dropdown menu and pick your target format:
- JPG – JPEG Image (Recommended for web use and photos)
- PNG – Portable Network Graphics (Recommended for transparency and web graphics)
- BMP – Bitmap Image (Lossless quality for editing)
- GIF – Graphics Interchange Format (Animated and simple graphics)
- TIFF – Tagged Image File Format (Professional print production)
- WebP – WebP Image (Modern web format for smaller file sizes)
- ICO – Windows Icon (Desktop and application icons)
- DIB – Device Independent Bitmap
- EMF – Enhanced Metafile (Vector format)
- WMF – Windows Metafile (Vector format)
Step 3: Set Output Folder
Click the Browse… button next to the Output Path field. Choose the folder where you want converted files saved, then click OK to confirm.
Step 4: Adjust Settings (Optional)
Click the Settings button to open the preferences panel. You can adjust:
- Image Quality: 1–100 (higher = better quality, larger file size)
- Image Resolution: 72–600 DPI
- Save to Source Folder: Check to save converted files in the same folder as the originals Click OK to save your changes.
Step 5: Start Conversion
Review the file list to make sure everything you want is included, then click Convert.
A progress dialog will appear showing:
- Overall completion percentage
- The file currently being processed
- Live conversion status
- Log details (success/error messages) When finished, click Open Output to view your converted files.
Advanced Operations
Selecting Specific Files
Click the checkbox next to any file to select it individually. You can also hold Ctrl and click to select multiple files at once. Selected files can be removed using the Remove button.
Clearing the File List
Click Clear All to remove every file from the queue. Confirm the action when prompted.
Changing the Interface Language
Open the Settings dialog, select a language from the dropdown menu, and click OK to apply the change.
Supported Formats
Input Formats (15+)
表格
| Category | Formats |
|---|---|
| Standard | JPG, JPEG, JFIF, PNG, BMP, GIF, TIFF, TIF |
| Vector | EMF, WMF |
| Modern / Other | WebP, ICO, DIB, HEIF, HEIC |
Note: SVG, DICOM, DJVU, EPS, and camera RAW formats are not currently supported.
Output Formats (10)
表格
| Format | Description | Best For | Status |
|---|---|---|---|
| JPG | JPEG Image | Web, photos, email | ✅ Supported |
| PNG | Portable Network Graphics | Transparency, web graphics | ✅ Supported |
| BMP | Bitmap | Lossless editing, archival | ✅ Supported |
| GIF | Graphics Interchange Format | Animation, simple graphics | ✅ Supported |
| TIFF | Tagged Image File Format | Professional printing | ✅ Supported |
| WebP | WebP Image | Modern web, smaller files | ⚠️ Saved as PNG |
| ICO | Windows Icon | Desktop and app icons | ✅ Supported |
| DIB | Device Independent Bitmap | Cross-platform compatibility | ✅ Supported |
| EMF | Enhanced Metafile | Vector graphics | ⚠️ Under development |
| WMF | Windows Metafile | Vector graphics | ⚠️ Under development |
Settings and Preferences
Image Quality
- Range: 1% – 100%
- Default: 90%
- Recommendations:
- 70–80% for web use (smaller file sizes)
- 85–95% for photos (balanced quality and size)
- 100% for maximum quality (largest file size)
Image Resolution
- Range: 72 – 600 DPI
- Default: 300 DPI
- Recommendations:
- 72 DPI for web and on-screen use
- 150 DPI for document embedding
- 300 DPI for standard printing
- 600 DPI for high-definition print output
Save to Source Folder
- When enabled: Converted files are saved in the same folder as the original images
- When disabled: Files are saved to your manually specified output folder
Language Settings
- Auto-detect: Uses your system language on startup
- Manual selection: Choose from 6 available languages
Frequently Asked Questions
A: No, camera RAW formats are not currently supported. The app works with standard formats including JPG, PNG, BMP, GIF, TIFF, and WebP.
A: Yes. You can add multiple files or entire folders for batch processing. The progress dialog shows live status for every file.
A: Yes. Select ICO from the format dropdown. Images are automatically resized to 256×256 pixels, the standard size for modern Windows icons.
A: The app automatically resolves duplicates by appending a number to the file name (e.g., photo.jpg becomes photo_1.jpg), so original files are never overwritten.
A: There is no strict file size limit, but very large images use more memory and take longer to process. For best performance with large batches, use a system with at least 4 GB of RAM.
A: Yes. Open the Settings dialog to adjust output resolution anywhere from 72 DPI to 600 DPI.
A: Yes. Conversions run in the background on a separate thread. The progress dialog stays open, but you can switch to other applications while processing continues.